No products in the cart.
Hundreds Of Earthquakes Rattle The U.S. As The Level Of Seismic Activity In North America Continues To Rise

 Why is the mainstream media being so quiet about all of the seismic activity that has been happening all across the United States? During the last 7 days, there has been an earthquake swarm directly along the New Madrid Fault zone, Kansas and Oklahoma have been hit by a very unusual number of significant quakes, and there have been several sizable seismic events in the vicinity of the Yellowstone supervolcano. But of course the west coast is getting hammered more than anyone else. According to Cal Tech, there have been more than 1000 earthquakes in California and Nevada over the last week, but of course most of them have been very small. Overall, the latest USGS numbers tell us that there have been more than 2,000 earthquakes nationally during the last 7 days, and apparently we aren’t supposed to be alarmed by that. But could it be possible that all of this seismic activity is leading up to something really big?
Over the weekend, we witnessed some very unusual quakes in the middle of the country. On Sunday, a magnitude 3.2 earthquake rattled Kansas…
The Kansas quake hit at 9:08 p.m. Central time near South Hutchinson, northwest of Wichita, according to the USGS. About 175 people reported feeling the tremor, some as far away as Osborne and Concordia, Kansas.
Thankfully that quake hit in an area with a very low population density, and so it didn’t affect that many people.
But then on Sunday, a series of relatively large earthquakes hammered Oklahoma…
A 3.0-magnitude earthquake hit near Fairview in northern Oklahoma, at 1 a.m. Sunday, followed by a 2.6-magnitude quake at 1:37 a.m. near Quinton in eastern Oklahoma, the USGS reports. A 2.7-magnitude tremor rattled Waukomis in northern Oklahoma at 4:25 p.m. Saturday
Overall, there have been 143 earthquakes in Oklahoma in the last 30 days, and the increasing level of seismic activity in that part of the nation definitely has a lot of people on edge.
But of much greater concern is what has been happening along the west coast. The two major quakes that hit California in July were followed by more than 100,000 aftershocks, and scientists are warning that this “may have increased stress on parts of a major dormant fault line”…
A series of earthquakes which shook Southern California earlier this year may have increased stress on parts of a major dormant fault line which has not produced any significant activity since records began, according to a study.
Scientists from the University of Iowa examined the so-called Ridgecrest earthquakes, which began with a 6.4 magnitude foreshock in the Mojave Desert on July 4, followed the next day by a 7.1 magnitude quake—the largest in Southern California for two decades. In addition, more than 100,000 smaller aftershocks were recorded.
The “dormant fault line” which they are talking about is the Garlock Fault.
And the Garlock Fault runs directly into the San Andreas Fault.
One day there will be a massive quake that fundamentally alters the geography of southern California, and let us hope that day is delayed for as long as possible.
Meanwhile, we have also witnessed some unusual rumbling off the coast farther north.
In fact, five large earthquakes were detected off of the Oregon coast last month. The following comes from a news story that was posted on October 21st…
A magnitude-4.6 earthquake Monday morning became the fifth to strike off the Oregon coast since the beginning of the month.
The quake rumbled around 6:47 a.m. about 120 miles west of Bandon and at a depth of roughly 6 miles, according to the U.S. Geological Survey.
On Thursday, a magnitude-4.7 temblor struck about 95 miles from Port Orford — just hours after students in Coos and Curry counties participated in an annual earthquake drill.
The reason why these quakes are so alarming is because they happened in the vicinity of the Cascadia Subduction Zone.
As Steve Quayle recently told Greg Hunter, someday the Cascadia Subduction Zone will suddenly come to life, and it will be the greatest natural disaster that we have seen so far in all of American history…
What’s the worst case scenario if the Cascadia Subduction Zone lets loose and volcanos, earthquakes and tsunamis are unleashed? Quayle says “The amount of damage, and I am going to choose my words carefully, is going to be precedent setting. It’s going to be the combination of volcanos going off that are inland from the subduction zone where the plates meet, coupled with tsunamis. . . . When this happens, you will lose eight million to twenty million people. When it happens, you will lose all productivity in the electronic field, obviously Silicon Valley, and all food production in all of California, Oregon and Washington. When it happens, you will have a State of Emergency unlike any other. How about the refugees? There will be 3.5 million refugees to take care of. When this happens, what happens to the underground aquifers, and where does everybody go for fresh water? There will be years of drought, years of famine and years of water, water where did it all go? It is a very dire situation painted by computer models. This is not a sensational thing. It is a reality based, scientific study with the application of what happens.”
Quayle warns that the public would likely have roughly “15 minutes to get to safety,” and “the tsunami waves would be 500 to 1,500 feet tall.”
You can see the trailer for the new film that is being produced about the Cascadia Subduction Zone right here. I am so glad that this movie is being made, because I have been trying to warn people about what is going to happen for a long time. For example, the following comes from one of my previous articles entitled “You Have Been Warned: Experts Tell Us That A Cascadia Subduction Zone Earthquake And Tsunami Will Destroy Everything West Of Interstate 5”…
One day it will happen. With little or no warning, the Cascadia Subduction Zone will produce a catastrophic earthquake and accompanying tsunami that will essentially destroy everything west of Interstate 5 in the Pacific Northwest. It will be the worst natural disaster up to that point in American history, and as you will see below, the experts are saying that we are completely and utterly unprepared for it. Of course the San Andreas Fault gets more publicity, but the truth is that the Cascadia Subduction Zone is capable of producing a quake “almost 30 times more energetic” than anything the San Andreas Fault can produce.
Scientists assure us that it is just a matter of time before such a disaster takes place.
So essentially those living right along the coast are taking a huge gamble.
Day after day, they hope that there is still at least a little bit more time before the Cascadia Subduction Zone absolutely devastates the Northwest.
Of course up until now that gamble has paid off, but one day their luck will suddenly run out.
About the Author: I am a voice crying out for change in a society that generally seems content to stay asleep. My name is Michael Snyder and I am the publisher of The Economic Collapse Blog, End Of The American Dream and The Most Important News, and the articles that I publish on those sites are republished on dozens of other prominent websites all over the globe. I have written four books that are available on Amazon.com including The Beginning Of The End, Get Prepared Now, and Living A Life That Really Matters. (#CommissionsEarned) By purchasing those books you help to support my work. I always freely and happily allow others to republish my articles on their own websites, but due to government regulations I can only allow this to happen if this “About the Author” section is included with each article. In order to comply with those government regulations, I need to tell you that the controversial opinions in this article are mine alone and do not necessarily reflect the views of the websites where my work is republished. This article may contain opinions on political matters, but it is not intended to promote the candidacy of any particular political candidate. The material contained in this article is for general information purposes only, and readers should consult licensed professionals before making any legal, business, financial or health decisions. Those responding to this article by making comments are solely responsible for their viewpoints, and those viewpoints do not necessarily represent the viewpoints of Michael Snyder or the operators of the websites where my work is republished. I encourage you to follow me on social media on Facebook and Twitter, and any way that you can share these articles with others is a great help.
The post Hundreds Of Earthquakes Rattle The U.S. As The Level Of Seismic Activity In North America Continues To Rise appeared first on The Economic Collapse.
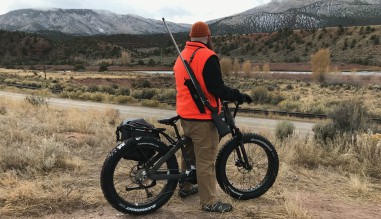
 mountain bike on single track, I would not want this much tire. Really fat tires would be heavy and hard to push around on a normal bike but the traction from the fat tires bring is insane, and makes you feel much safer on the mountain. With this being an
 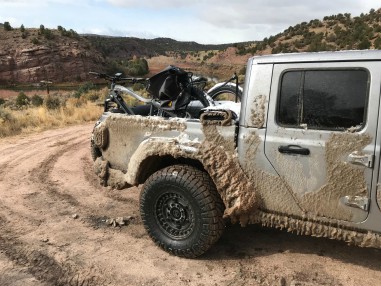 hanging over the tailgate using a
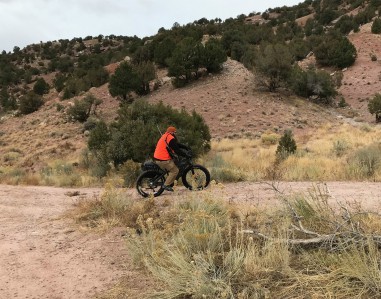
 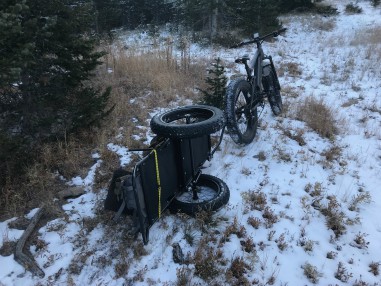 you do have to watch out for larger rocks on the trail with the
  morning we saw 3 elk walk into a pasture on the backside of a mountain at 10,500 feet. Without the QuietKats this would have been a painful journey and getting an elk here would have made for a long day of packing meat out with at least one extra trip up the mountain. With the QuietKat & trailer, just one trip down the mountain, elk & gear.


 My hometown has great drinking water, and
  The point is, bad water can and will happen in modern times. The
 How does the water taste through the
  Epic Water Filters also makes a wide mouth
  I took the
  In my opinion, the best thing about the
  If you have a bugout location, you should study the route for water sources. If you live in a rural area and work away from home, you should study your route home. If water sources are abundant, this would be a great option for your bag or vehicle. Too many people are guilty of throwing a
 Are you thinking about installing window security film on your home? IF so, good for you!
 BEST LOCATIONS TO INSTALL WINDOW SECURITY FILM


 It's easy to find all march locations in the map:
  All details for


