No products in the cart.
Can You Live Off-Grid in A Van or Motorhome?

Van life is a very popular trend among young individuals seeking freedom, a simple life, and exploration. Off-grid living is a popular trend in the same vein that it incorporates the goals of freedom and simple living. Is van life and off-grid living mutually exclusive? Can you live the van life as a prepper and enjoy the aspects of off-grid living? For some budget conscious individuals, they may just be looking to live this style of life while building or saving for a more permanent home. For preppers, as during the COVID-19 pandemic, motorhomes can also be for self-isolation.
Related: Selecting a Campground as a Bug Out Location
Most of us have romantic notions about off-grid living. Sure, growing food and sourcing water would be hard, laborious work. But it would be honest work. Even better, it would all be an exercise in independence. There would be no bureaucrats, no middle-men; no corporate influence — just you, your loved ones, and the raw materials of the Earth.
It is in this sense that we think of off-grid living as a life “how it should be.” A natural life. The good life. The romanticism goes on.
But in today’s increasingly interconnected and globalized world, how realistic is the off-grid lifestyle? Is it even legal in so-called liberal democracies? And if it could be achieved, would it ultimately be desirable, and worth the effort?
These are the questions this article is looking to explore.
Off-grid living seems idyllic, even the ‘right’ way to live.
Freedom and Defining Off-Grid
In order to explore how possible off-grid living is, we first need to define what people mean when they talk about it. Some definitions are more strict than others. For example, some people take off-grid living to be:
- Living independently of the public power grid.
- Living free of all public utilities, including water.
- Completely avoiding all public infrastructure, such as roads.
- Being completely independent of all walks of life, including food-shopping and healthcare.
For most people, the romanticism associated with off-grid living can be
found at the most extreme end of this scale — but few would seriously want to
put their health at risk in the event of an emergency.
Most people — and as we shall soon see — tend to think of the first step
as sufficient enough. After all “grid” is a synonym for electrical grid. This
is literally where the expression comes from.
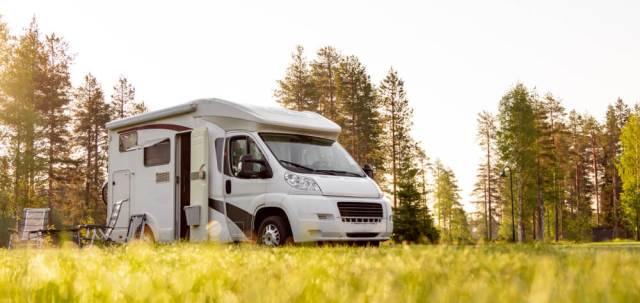
Living Off-Grid in a Van or Motorhome — Is it Possible?
To attempt the off-grid lifestyle in a motorhome is to automatically be dependent on the road network. This way of life is appealing to many, because it opens up whole new areas of the world to settle down in, relax and explore. It also makes you more answerable to governmental legislation, which more often than not interrupts any romantic notions of “freedom” and “independence.”
For example, in the UK, it is not possible to just find someplace out in
the countryside, settle down and start cultivating the land. Not without
permission. You can settle down somewhere for 28-days, but after that
the local authorities will demand you move on (unless you successfully apply
for planning permission).
But here are some things you can do:
- You could look for a residential site or holiday site for motorhomes that is welcome all year round. Although some sites have legal requirements for you to leave the site for a period of 48-hours every three months or so. But that’s not really a problem, and could give you the chance to do some exploring.
- You could live off-grid on someone else’s land with their permission. This is known as ancillary accommodation. And “someone else’s land” can refer to anything, from pastures and meadowland, to a large garden and even somebody’s driveway.
And that’s about it! You could opt for a full nomadic lifestyle, with no fixed address — but you would soon run into problems, and this would make the off-grid lifestyle nearly impossible. As without ancillary accommodation, you would have to keep moving about.
Living ‘off-grid’ in a motorhome is appealing to many, for extra independence.
Off-Grid Living or Full-Time Touring?
If we are willing to bend the rules of what constitutes off-grid living,
then full-time touring is an option. This is actually really popular, because
it provides motorhome-owners with all of the perks of travelling and
independence, and none of the downsides.
For example, someone who is touring full-time could still visit the shops to get food. And (a neat trick that a friend told me) could join a 24-hour gym for the sole purpose of a hot shower. People living the van life often join a YMCA to enjoy the “use any YMCA gym” benefit that membership comes with. It would entirely be possible to be off-grid in terms of power usage, but on the darkest and coldest winter nights, hook-ups would still be an option at most sites.
Full-time tourists can even take advantage of motorhome sites with no
power grid. These sites are unpopular even on bank holidays and in the height
of summer, and will provide plenty of spaces to sit back, relax and enjoy what
life has to offer.
Off-Grid Energy in a Motorhome
For the purposes of the rest of this article, we are going to assume you
want to be somewhat self-sufficient; as close to the romanticism of off-grid
living as possible. In that case, you will need to know what to do for
power.
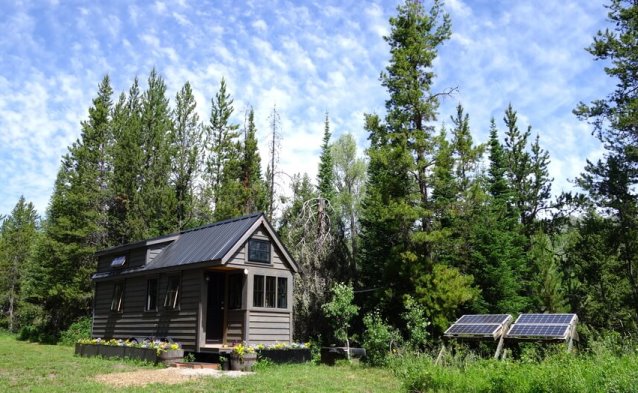
- Solar panels — The most important source of power will come from the sun. Technological improvements over the years have driven the cost of solar panels right down, and a good one will last over a decade if looked after properly. Mounted-roof panels are ideal because you can pivot them to follow the sun, and after nightfall, fold them away and store them inside to prevent theft.
A 100-watt panel wired into two 110-amp leisure panels should serve your energy needs in a motorhome well, though you might have to sacrifice some — in my opinion easily doable — electronics. Such as: TV (watch on a laptop instead); toasters, coffee makers, French press, and so on (you can find more practical ways to make coffee and toast). A 200-watt panel is also suitable.
- Propane Gas — The second most important type of power source is gas. In the summer, gas works to keep our refrigerators cool. In the winter, we burn gas for warmth. Without mentioning specific brands, a refillable gas system should cater well for your gas needs — with a backup cylinder in reserve. Shop around and find the best cost-for-cost cylinders. Two cylinders should last about three weeks. You can even buy 100lb steel propane tanks for more semi-permanent residence!
- Generators — Generators are noisy and smelly, so they are best used as a backup, when the solar panel cannot generate enough power. If you are power-smart, a 500-watt one might be enough to manage on. Higher energy consumers might opt for a two-kilowatt generator. Invest in a good brand and you should get a decade of use out of it. Honda makes a super quiet 1000-watt generator with an inverter and a 3000-watt version. They’re more costly than others, but the benefits could outweigh the costs. You also have the added benefit of Honda quality.
- A car engine — If you don’t have a generator and just need a little backup in case everything goes out, then the engine of a car or other motorhome may be just the trick. All engines like these have alternators and can provide sufficient charge in half-an-hour or so.
Somewhat surprisingly, power-sufficiency is probably the easiest part of
the off-grid lifestyle. Though be warned: it can get expensive. But if you can
afford it, it should well be within your grasp to manage.
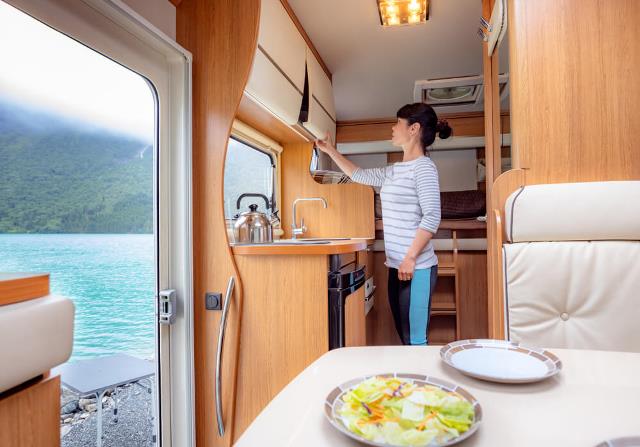
Food and Water Self-Sufficiency in a Motorhome — Can it be Done?
The answer to the water part of this question can be dealt with quite quickly: no. Even some of the most die-hard off-grid enthusiasts still have to resort to a public utilities source for their water. Most lakes and rivers are, unfortunately, polluted or riddled with vomit-inducing microorganisms. A travel Berkey gravity-fed water filter can help, or something like the Katadyn small group water filter, but those only go so far – and they assume a ready supply of water.
You could consult a geographical map, find an area with a
naturally high water table, and try digging a well. But such an endeavor will
cost a lot of money, require apparatus to pump the water out, by no means be a
guaranteed success and (you guessed it) will rattle the attention of the local
authorities.
Self-sufficient food and water is much harder to manage than electricity and gas.
For food, the answer is: definitely sometimes. You can grow a surprisingly large amount of food in a relatively small place; raised-beds are a perfect example of this. You can then supplement whatever you grow with more edible fruits and plants grown in containers. Even a raised-bed around 24-inches wide should be sufficient for a couple of people (read Square Foot Gardening to see how). You can raid local supermarkets for food-waste and cardboard to re-purpose as compost, too. But that’s a lot of work!
Related – How to Build a Concrete Block Raised Bed Garden
The problem is, for such self-sufficiency to be possible, you will have
to ground your motorhome for months at a time. Growing food this way also
requires meticulous and strategic care — akin to becoming something like a
low-level biologist — and you will have to deal with pests, plant-disease, and
bad weather on top of all that. Self-sufficient food crops have also been
linked to bad breath and digestive problems.
At the very least, it would be possible to be somewhat self-sufficient
some of the time. This goes for people who live in a fixed abode as well, and
not just for motorhome enthusiasts. The general consensus from the people
who’ve tried it seems to be: it is far better to grow some food for the
sense of accomplishment, but not to depend on it.
Thoughts and Conclusions
In short, the answer to the question: “Can you safely live off-grid in a
van or motorhome?” depends on your interpretation of what the word“off-grid”
actually means, and if one is allowed to bend that definition. As we have
explored, simply driving around and using the roads is by some interpretations
off-limits for anyone who truly desires to be independent from the
network.
You can certainly live in a motorhome independent of a national power grid. With careful management of your solar panels and gas canisters — this is actually one of the least problematic areas of off-grid living. And it is certainly achievable and has some advantages.
But sourcing food and water is very difficult. At best, and at some expense and risk, and strategic thinking, you may be able to be food and water self-sufficient some of the time. It will be hard work, but it will be honest labor. And in the periods where one can live truly off the Earth, there are few greater senses of accomplishment.
—
This Author
Neil Wright is a copywriter and researcher. He has an interest in travel, science and the natural world, and has written extensively about off-grid living in the UK on his motorhome website.
The post Can You Live Off-Grid in A Van or Motorhome? appeared first on SHTF blog – Modern Survival.