Note: Today I’m only going to recommend survival food kits from companies that I’ve personally reviewed, taste-tested, and purchased with my own money. – “Just In Case” Jack
I believe every adult should own several survival food kits.
Why? Because having a survival meals on hand for when times get tough is just plain smart.
FEMA recommends at least three days’ worth of food for emergencies.
But I consider 3 days “an absolute bare minimum”. It should ONLY be a starting point…
In order to be resilient to life’s inevitable shocks, and uncertainties you must arm yourself with more than just “the bare minimum”.
How? By researching.
Spending time reading articles, like this one, to find the best survival food kits for YOU.
It sounds simple, but here’s the problem. There are thousands of emergency food kits on the market today. The market is flooded with them.
It seems like all food companies are marketing and selling emergency food kits nowadays. But not all kits are worth your hard-earned money.
Some are great, some or ok, but many are not worth a damn…
And that’s why I wrote this survival food article. To help you invest in some of the best survival food kits without all the hassle. To give you guidance and confidence to ensure you get a great deal on your next survival food kit purchase.
So today I’ll be sharing everything I know about survival food kits, specifically.
Note: If you already know what a survival food kit is and why you should get one – feel free to click any link above to skip ahead…
As A Way To Introduce You To Skilled Survival, We’re Giving Away Our Family First Food Planning Guide. Click Here To Get Your FREE Copy Of It.
EXACTLY WHAT IS A SURVIVAL FOOD KIT ANYWAYS?
In the broadest terms, a survival food kit is simply a collection of non-perishable foods to help you survive an emergency.
But that’s just the tip of the iceberg.
Survival food kits come in all different sizes, preparation methods, and price points. They also come in all sorts of different container options – from bags to buckets.
Now once you start digging into the details, there are many emergency food kit options to consider. So, let’s start breaking all these options down in a helpful way.
 WHAT TO LOOK FOR IN A QUALITY SURVIVAL FOOD KIT (plus things to avoid)
First off, not all survival food kits are created equal. Much of the quality of a survival food kit is in the way the food is prepared AND how it’s sealed.
Preparation Options
The best survival food kits are prepared using a technique called freeze-drying.
Freeze-drying is a process by which nearly ALL the moisture is removed from the food. It’s done by the way of using low temperature and sublimation.
Freeze-dried foods are ideal for survival food kits. Why? Because less moisture equates to extremely long shelf life. We’re talking about the shelf life of multiple decades.
Plus, the process of freeze-drying allows the food to better retain its original texture.
This allows you to store the food dry but by adding it back into some boiling water the food reconstitutes. The dried food will absorb the water and comes back to a similar taste and texture as the original food.
What About Dehydration?
Dehydration is another food preservation option. But dehydration won’t remove nearly as much water AND the food won’t reconstitute as well.
So while dehydration is OK, it’s not the best.
What About MRE’s?
MRE’s meals are food items packed and sealed in mylar bags to extend the shelf life of the food inside. And sure, MRE’s have a longer shelf life than fresh foods but not nearly as long as freeze-dried foods.
For a comparison, MRE’s typically have a stable shelf life of anywhere from 1 – 5 years. But, freeze-dried foods are shelf-stable for up to 30 years!
Sealing & Storage Options
Once you have some food prepared, there are several food storage options available.
Mylar Bags
Mylar bags are a staple in emergency food storage.
They were originally known as BoPEt film. This film was invented by Dupont in the mid-1950s and quickly used by NASA ever since – that’s why they are also sometimes called “space blankets“.
They’re basically a thin bag made of special foil that is “unbreathable”. That means once sealed, tiny air molecules cannot pass through it.
This has one major advantage – keeping moisture and oxygen OUT.
You see, food won’t spoil is it’s kept in an environment in which organic material (mold) cannot grow. Organic materials need a few ingredients to begin growth, 2 of them being moisture and oxygen.
Without moisture and oxygen – mold cannot do its thing.
So, with a mylar bag, you’re putting in super dry freeze-dried foods and sealing it up. No moisture can pass through the mylar bag walls, keeping harmful moisture out – until your ready to eat it.
But here’s the deal, you can also toss an oxygen absorber or two into the bag with the food. These little packets will absorb any oxygen within the bag. Leaving the inside of the bag without enough oxygen for mold to grow.
But mylar bags by themselves are NOT enough.
Why? Because determined vermin can chew through these bags. And that’s where thick food grade buckets or tubs come into play.
Thick Plastic Food Grade Buckets / Tubs
To protect your survival food from vermin you need to put the mylar bags of food into buckets.
Bucket storage can also provide a few other benefits.
First, the food becomes stackable. Without buckets or tubs, you’ll have to store the survival food kit bags on open shelving. But they can take up a ton of useable space.
Instead, with hard plastic buckets or tubs, you can stack them from floor to ceiling. This saves a ton of space in your pantry or basement.
Another benefit of plastic buckets is that most of them have a robust carry handle.
Now, most people don’t plan to move their survival food kits often. But remember they last decades. So, who knows what may happen over the next few years – let alone decades?
You might move to a new house, or you might want to move the buckets to a different location within your home. And if you’re forced to bug out with a vehicle, a bucket with a handle makes this process much easier.
Affordability / Price
Of course, with most things in life, you get what you pay for…
But with survival kits, careful shopping can pay off big time. For example, there are often bulk discounts to be had. And sometimes you can get a “free” sample kit to try a certain brand out.
But you must be careful. It’s easy to focus on only the price but there’s a lot of misinformation within the survival meals space.
Everyone is jockeying to be the “best deal” or the “best food” or they add extra incentives to get you to buy.
And sometimes, these deals and incentives are perfectly fine. But make sure you’re confident you’re not getting duped. Price is a very important variable but not the ONLY one.
The bottom line is IF you understand what you’re getting, you can choose the RIGHT survival food kit for YOU. And it may just become one of the best investments you’ll ever make…
As A Way To Introduce You To Skilled Survival, We’re Giving Away Our Family First Food Planning Guide. Click Here To Get Your FREE Copy Of It.
 WHY A SURVIVAL FOOD KITS MAY END UP BEING THE BEST INVESTMENT YOU EVER MAKE
Here’s the deal, the future is uncertain AND history is full of horrific disasters…
Whether a disaster is due to severe weather, or countries deciding it’s a good idea to destroy each other…
Regardless of the event – it’s a fact, the future is uncertain.
That’s why survival kits are so important. They’re something resilient people embrace and take seriously. They’re something the fragile masses tend to ignore, or worst, assume bad things will never happen to them.
And the more survival food kits you own the more resilient you become. Why? Because while 72 hours is better than nothing – disasters don’t follow such protocols.
72 hours will work for MOST emergencies BUT not all…
Recent history is full of massive famines that lasted much longer than “72 hours”:
- Great Famine – Ireland (1845 – 1853) – 1.5 million dead
- Vietnamese Famine of 1945 – 2 million dead
- North Korean Famine (1994 – 1998) – 3 million dead
- Russian Famine of 1921 – 5 million dead
- Bengal Famine of 1943 – 7 million dead
- Bengal Famine of 1770 – 10 million dead
- Soviet Famine (1932 – 1933) – 10 million dead
- Chalisa Famine of 1783 – 11 million dead
- Chinese Famine of 1907 – 25 million dead
- Great Chinese Famine (1932 – 1933) – 43 million dead
I don’t know about you, but I’m not willing to roll the dice on starvation. It’s a horrific way to die!
And sure, the odds are unlikely any of us experience a starvation level disaster in our lifetimes. But even at low odds, it’s not impossible.
How much are you willing to bet that your right? Your life?
It’s crazy to me that people are willing to spend thousands of dollars on home insurance and car insurance. But avoid stepping up to buy something more important “food insurance”.
When you buy car insurance, you’re taking the side of the bet that says, “I’m betting I’ll have an accident in the next 6 months”. Your insurance company is taking the other side of the bet “that you WON’T have an accident in the next 6 months.”
And the insurance company is usually right – that’s how they make money. But even tho they are usually right, you’re still not willing to take that gamble.
Because if you lose, it could mean some serious financial hardship…
But with starvation – it’s not a financial hardship we’re talking about – it’s a slow, horrible, painful DEATH!
That fact changes EVERYTHING.
It makes it so you must do everything in your power to protect yourself from even tiny odds. Because while the odds are small, they are not impossible, and the downside is much too great.
People “think” they’re good at calculating the odds of things (we’re not). But we’re even worse at seeing the REAL amount of downside from black swan type events.
There are smallish bad events (like a car wreck, or hail damage, etc.). But then there are life-shattering bad events (like mass starvation).
When the downside is starvation, it trumps the “odds” every time.
And here’s the deal. Putting money down on “food insurance” a.k.a. survival meals are a one-time investment. One that will last most of an adult’s entire lifetime (30 years).
As opposed to car insurance which is an investment you must pay regularly (monthly or yearly).
So, in contrast, you can spend a one-time investment on survival food and get a lifetime of starvation protection! Sign me up!
And if it pays out? It’ll be the BEST investment I’ll ever make, and it won’t be even close.
If a stock you buy goes up 10% per year for 30 years, it’s a fantastic investment, right? You have more money to spend on more “stuff” you don’t really need. Woo-hoo!
But, IF your “one-time survival food kit investment” pays off, YOU get to avoid STARVATION!!
So which investment has a better payoff?
This is why I don’t understand why EVERYONE doesn’t invest in some survival food kits.
BEST SURVIVAL FOOD KITS ON THE MARKET TODAY (from 72 hours survival food kits to 1 year)
Now you know what to look for in a quality survival food kit. And I sure hope you’re now properly motivated as well.
So let’s shift our focus on the best ones to buy.
Because the number of choices is overwhelming, making it a difficult selection process to narrow down. But that’s what I’m here for. I’m going to share with you what I believe are the BEST survival food kits on the market today.
Note: I’m going to share only survival food kit brands that I’ve personally reviewed, taste-tested, and invested with.
VALLEY FOOD STORAGE
Valley Food Storage is the first survival food company I bought food from several years ago. And I’ve been very pleased with their products.
Go here if you want to check out my taste test.
They have a wide range of kit sizes. Everything from a small 72-hour survival food kit to 1-year survival food kits.
They even have a monthly subscription plan available as well. That way, you can build your survival food in monthly increments.
All their kits (except for the 72 hours survival meal kit) comes in hard plastic stackable buckets. So, they exceed all quality marks and are a great company I highly recommend.
You can’t go wrong with Valley Food Storage as your survival food kit company of choice. Here are a few of their most popular kits by the length of supply:
 72 Hour Survival Food Kit
If you’re just looking to get started, then you’ll want to check out Valley Food Storage’s 72 Hour Survival Food Kit.
It’s an ideal starter survival food kit at an affordable price and it will provide nourishment for most short term emergencies.
They use thick mylar bags with wide seals at the top. This helps to ensure the bag remains closed to moisture and oxygen until you’re ready to consume.
Check Out Today’s Price
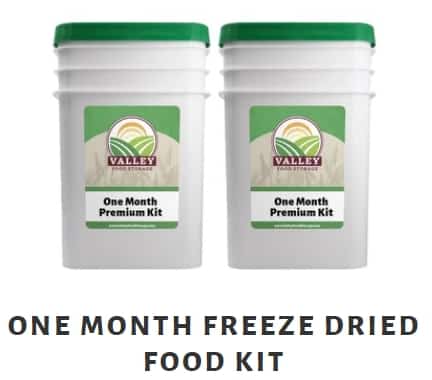
1 Month Freeze-Dried Food Kit
This one-month food kit includes the same quality mylar pouches that are in the 72-hour kit. But there’s one major difference: buckets.
The food pouches are sealed inside two hard plastic, stackable buckets.
These buckets help to ensure the food remains dry, provides excellent protection from vermin, and allows you to stack the buckets.
Check Out Today’s Price

3 Month Freeze-Dried Food Kit
Now we’re starting to enter into some serious resiliency to a food crisis.
This 3 Month Kit will provide enough calories to keep someone well-fed for about 3 months. Again, this kit uses excellent mylar pouches and buckets.
And these use the same high-quality ingredients as all Valley Food Storage freeze-dried survival meals.
Check Out Today’s Price
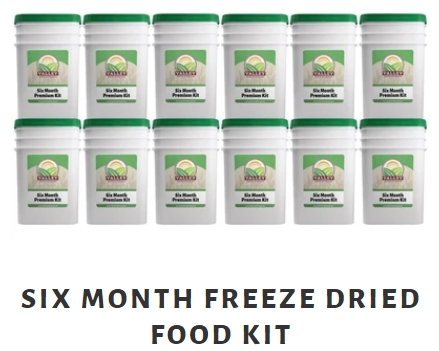
6 Month Freeze Dried Food Kit
6 months’ worth of food sure seems like a lot, And for most emergencies, it is.
But if you’re someone who takes resiliency serious, then it may be worth it to you to store this much.
Again, the same quality pouches, food, and buckets – just a whole lot more of them.
Check Out Today’s Price
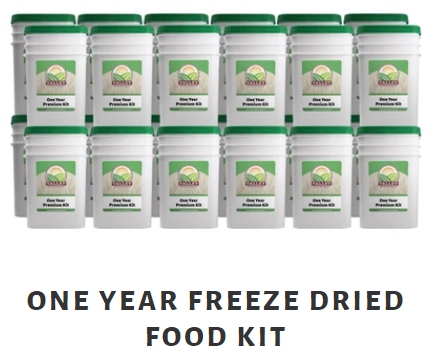
1 Year Freeze-Dried Food Kit
Of course, if you’re extremely motivated you increase your level of resiliency by stocking a year’s worth of freeze-dried food.
A year’s worth of food is my own personal target and yes, it’s overkill 99% of the time. But if I get unlucky I’m gonna be sure glad I made this investment!
Check Out Today’s Price
 Freeze Dried Food Kit Subscription Plan
This offering is unique.
This is the only company I’ve seen offer an emergency food monthly subscription plan.
Because a large one-time investment can be a challenge for some people. But by spreading out the costs monthly most people can build a nice stash of survival food kits over a few month’s time.
Check Out Today’s Deal
LEGACY FOOD STORAGE
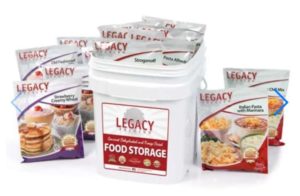 Legacy Food Storage is another quality survival food company. One I’ve personally reviewed and tested.
They also use a combination of freeze-dried food, mylar bags, and food buckets. This helps ensure their food kits stay shelf-stable for decades to come.
Their survival food kits start out at 60 servings all the way up to 4320 servings.
You can’t go wrong with Legacy Food Storage when it comes to quality food and price. They claim to offer the “lowest cost per lbs” of food and free shipping as well.
Here are a few of their most popular kits by “total number of servings”:
60 Servings / 120 Servings / 360 Servings / 720 Servings / 1440 Servings / 2880 Servings / 4320 Servings
They also have a few gluten-free survival food kits as well:
120 Servings / 240 Servings / 360 Servings
MOUNTAIN HOUSE
 Mountain House freeze-dried food pouches are popular in the backpacking scene. Why? Because freeze-dried food weighs a whole lot less than fresh foods – and they keep better!
This is another survival food brand I’ve bought from in the past and have reviewed.
Most survival food kits have a 25-year guarantee but Mountain House has upped their “taste guarantee” to 30 years! That’s the longest guarantee I’ve ever come across in the survival food kit space.
Mountain House offers survival food kits in pouches and buckets. But my one gripe is they don’t sell large quantities in buckets – so if you want to stock up, you’ll just need to buy more single buckets.
The bottom line is: Mountain House is not the cheapest but they are one of the best. You can buy survival food from them with confidence; they’re a fine choice.
Here are the survival food kits they have available with buckets:
HOW TO BUILD A SURVIVAL FOOD KIT YOURSELF
Now, you may be thinking…. hey, maybe I can do this myself.
And you’d be right; you ABSOLUTELY can.
But if you want to make your own freeze-dried foods, you’ll have to invest in a home freeze dryer machine. But freeze dryers are pretty expensive. They cost way more than your typical countertop appliance (like a food dehydrator).
A small freeze dryer will cost you at least $1600 or more. Which for some people, that’s no big deal, but for many, that’s a huge hurdle.
Now, you could use the freeze dryer to start your own small survival food kit shop. Or you could get a few friends to “share” the cost. Both of those options can help you make your own survival food kits.
But you’d still need to buy mylar bags, silica gel desiccants or oxygen absorbers, and food-grade buckets.
So, at the end of the day, most people find it a better deal to buy their freeze-dried food from a reputable company.
Your other DIY option is to NOT freeze-dry your survival food kits. Instead, focusing on storing dehydrated foods. And this can work OK IF you plan to rotate the “survival food” over time.
If you consume what you make and replace it often, you can create a rotating stockpile of survival food. But again, this adds another layer of hassle, complexity, and organizational skills.
So, if you’re up for it, you should absolutely DIY your survival food stockpile. But, either way, it’s going to be an investment in TIME or MONEY – you get to choose.
As A Way To Introduce You To Skilled Survival, We’re Giving Away Our Family First Food Planning Guide. Click Here To Get Your FREE Copy Of It.
FINAL THOUGHTS
Every year, you buy insurance and HOPE you never have to use it. And we are generally OK with this setup.
Well, the same goes for food insurance. You buy it and HOPE and PRAY you never need to use it!
And at the end of 30 years, if the food is still sitting there on the shelf, you get to eat it and enjoy it. Because nowadays freeze-dried survival meals taste great.
So, no matter what, an investment in survival food kits will never be a waste!
And one final thing to remember – there are no do-overs in survival. Woulda, coulda, shoulda won’t fill you or your families bellies in times of crisis.
Remember: Prepare, Adapt, and Overcome,
“Just In Case” Jack
P.s. Do you know where the closest nuclear bunker is from your home?
There are a lot of natural nuclear shelters in the US that are absolutely free. And one of them is near your home.
Click here to see the Closest Natural Nuclear Bunker to Your Home?

Click on the image above to find out where you need to take shelter.
The post 10 Best Survival Food Kits (Tested) That Will Make You Resilient To Emergencies appeared first on Skilled Survival.


 I recently went on a day hike in the desert and brought my
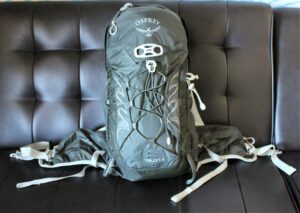
 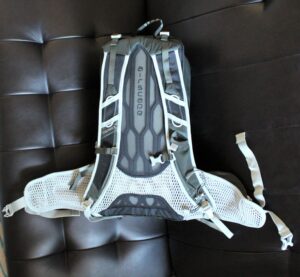 Enter the Osprey Talon 11. If you’re looking for a day hike pack, an everyday carry bag, or an innocuous pack for a grab-and-go bag, this is a good contender. It’s lightweight, comes in two sizes, has enough capacity to carry your essentials, and has a great suspension system. It will carry whatever you put in it comfortably. It has good back ventilation, a sternum strap, and a hip belt. Let’s take a closer look!
 The S/M has 9 liters of storage and the M/L has 11 liters. It’s on the small side for a day pack. If it were any smaller, I’d want a bigger one. The
  The
The 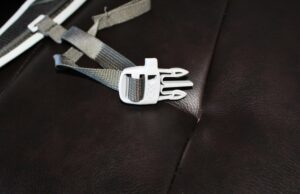 The sternum strap has a built-in whistle that works surprisingly well. This is a great addition that shows how much thought was put into the Talon. If you’re lost, you can blow the whistle instead of yelling (it’s louder and saves energy). The hip belt is one of my favorite features of this pack; they are made of breathable material and have a generously sized pocket on each side. They can be a little difficult to get into when you’re wearing the pack, but it’s far from impossible to access. These hip belt pockets are perfect for holding a compass, Chapstick, and
  The shoulder straps are comfortable and have lots of adjustment. There are two usable elastic loops on each strap, perfect for hydration tube routing. On the left strap, there is a long skinny elastic pouch sized just right for a pocket knife or a
  Specs:
 Ventilated back


 I’ve been in the prepping business long enough to see the ebbs and flows of the market. I was on the early side of it, when “prepper” was still associated with the fringe “survivalist” folks – loners in the woods sitting on stockpiles of guns and ammo. Since then, “prepper” has become a household term with prepping becoming far more mainstream than it has ever been to the point freeze dried food can be purchased in everyday places like Costco. Reasonable people are preppers. In fact, once you look at the many reasons to prepare, “reason” follows that you must prep!
 As preppers, we should already be aware of the necessary basics for prepping. If you’re new to prepping, you can start by reading
  The same as prepping for a recession requires different methods than prepping for civil unrest, prepping for climate change will require different methods as well. While climate change will require preparing for more hurricanes in certain areas, there are longer-term issues that will need to be addressed. Here are a few:
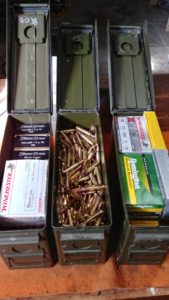 Preserving Food
 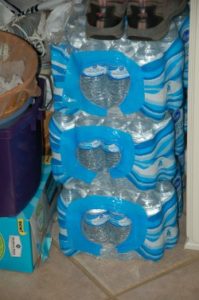 Whether you believe climate change is happening or not, whether you think it’s man-made or not, climate change preppers should be welcomed into the prepping community. Even if they don’t align with the typical prepper’s political beliefs, the more people that are prepared the better – regardless of their reasons!
 Looking for the best crossbow? Well, you’ve come to the right place.
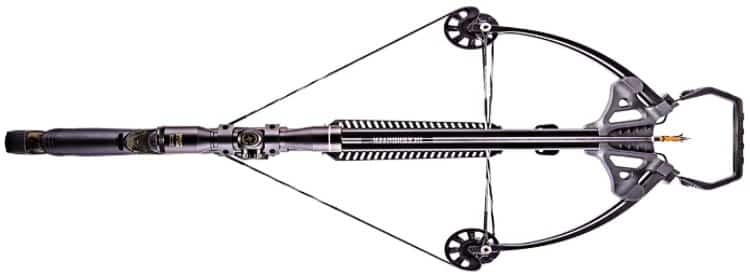 THE DIFFERENT TYPES OF CROSSBOWS YOU CAN CHOOSE


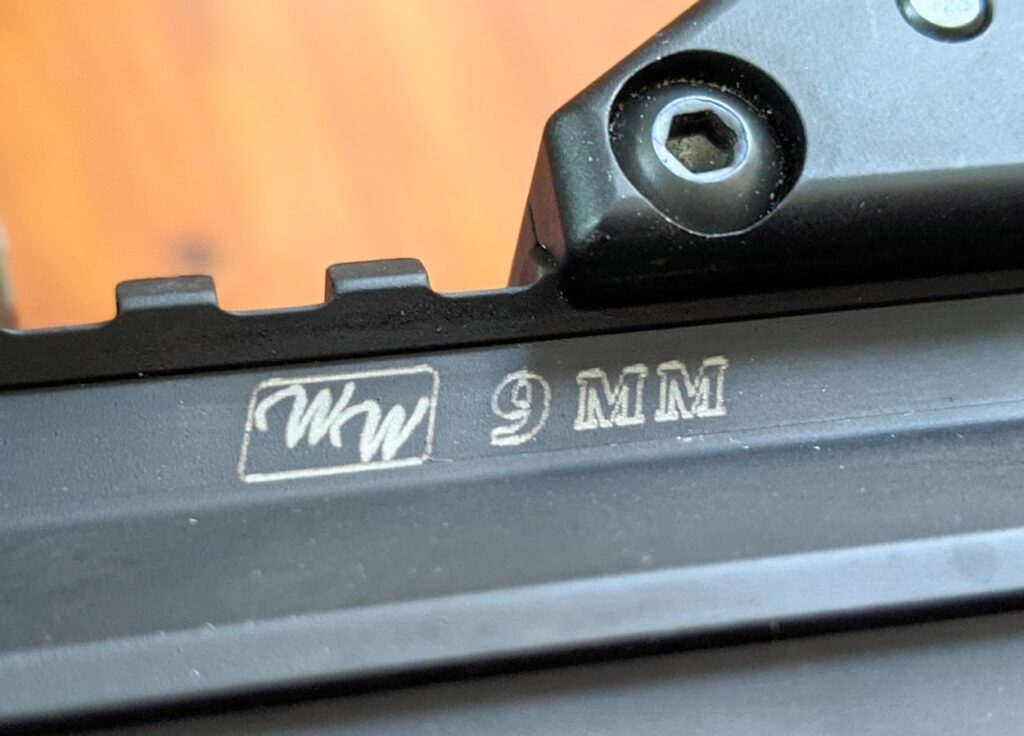 The Windham Weaponry R16FTT-9MM is a stellar piece of gear – well thought out but not over-designed to the point of lunacy. The whole package is approximately the same size as your standard
 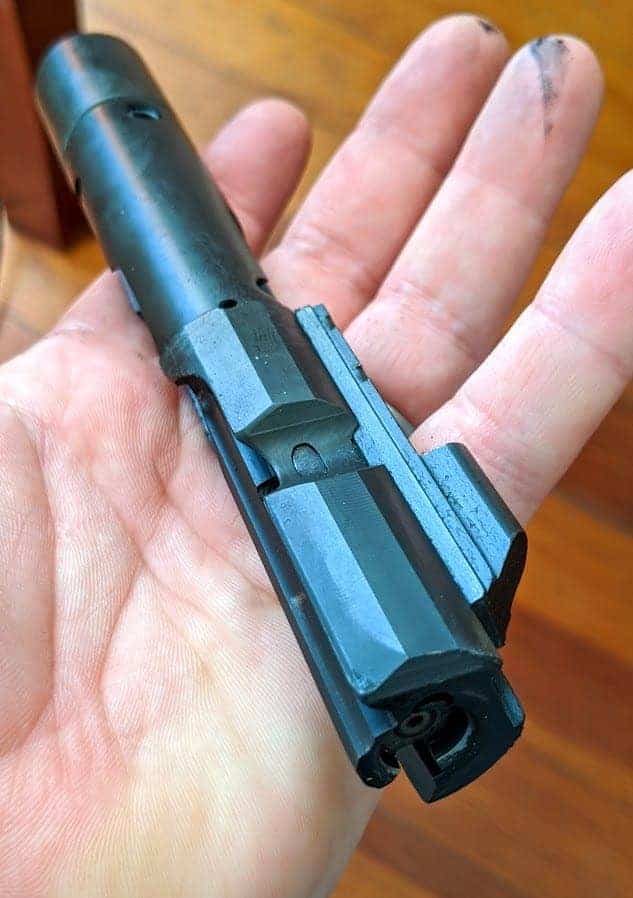 When you break the receivers apart, however, you start noticing the changes that make this Windham Weaponry rifle unique. First off, the ejector is fixed into the lower receiver via two beefy allen screws, and juts upwards from just behind the magazine well – much different (and far simpler) than the plunger ejector that lives inside standard AR-15 bolts.
 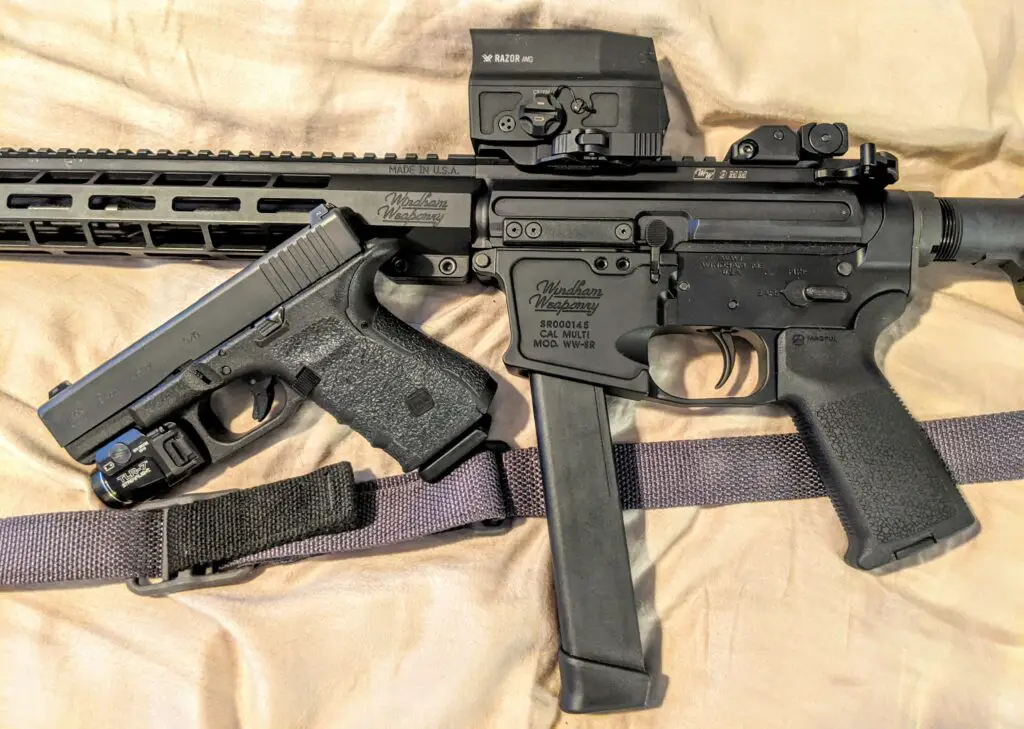 The real crowd-pleasing aspect of the Windham Weaponry 9mm carbine is its ability to source its high-velocity meals from 9mm Glock magazines. That’s right, proud
 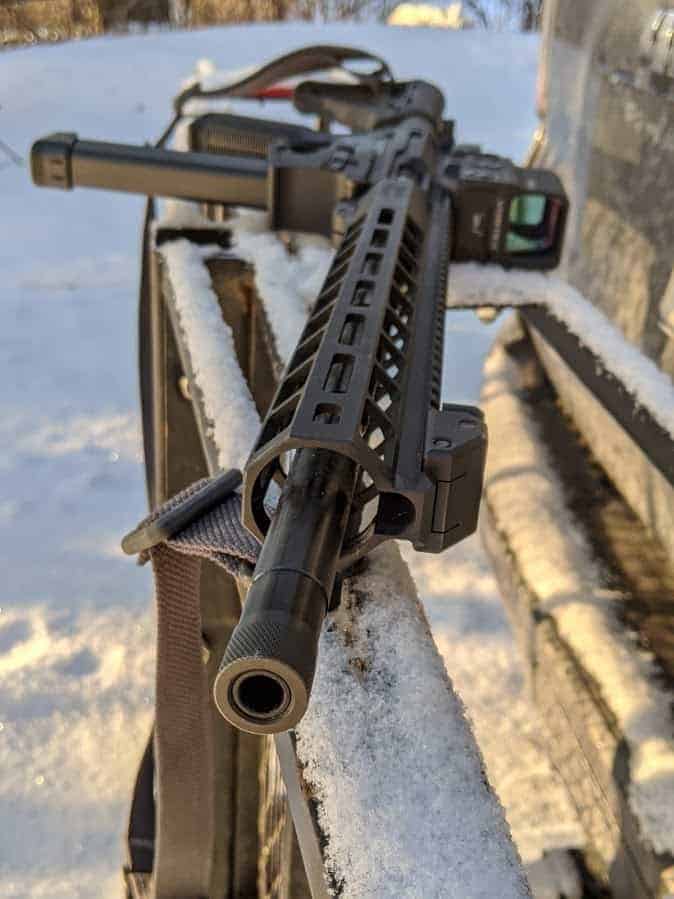 Since the carbine landed in my lap, I’ve been buying up a decidedly inconsistent mixture of polymer mags; 15-round Glock 19 and 17-round Glock 17 magazines, 33-round Glock “Giggle Sticks”, along with a complement of 15, 17, and 21-round Magpul GL-9 magazines. Every single one of them locks into the magwell securely and feeds the little 9mm rounds like greased snot through the blowback action of the Windham Weaponry 9mm Carbine.
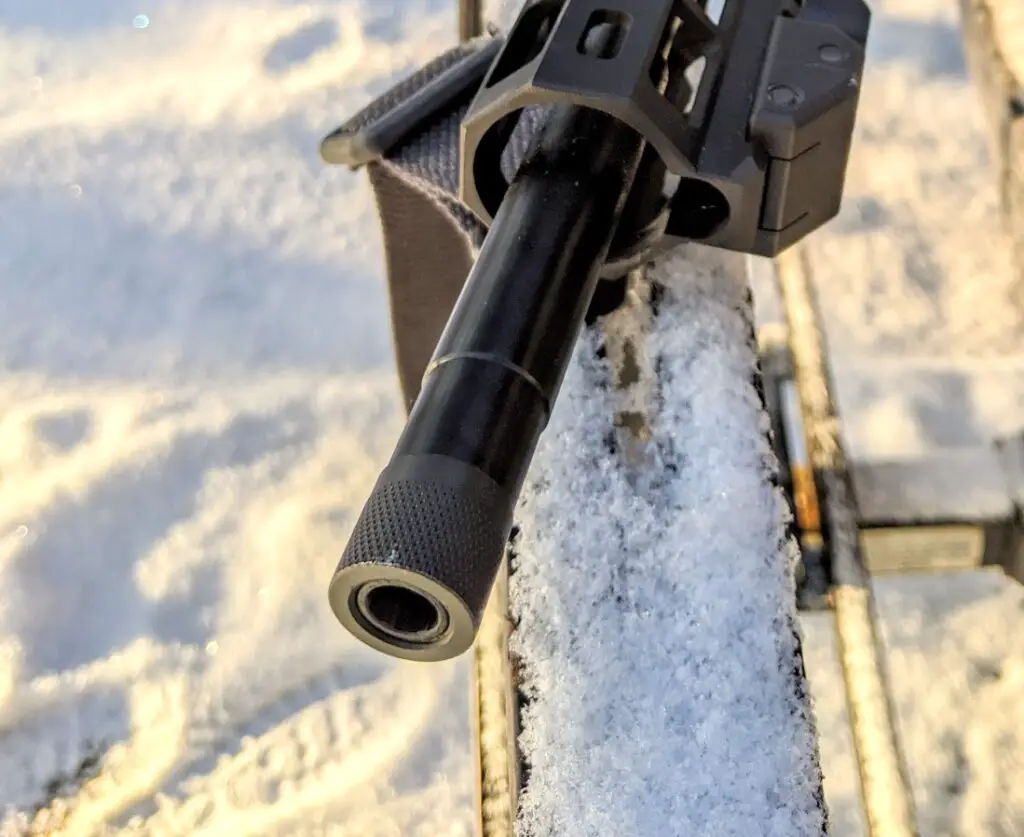 Since pistol caliber carbines are immensely popular no doubt due in part for their ability to be effectively suppressed, Windham Weaponry provided the 9mm Carbine without a muzzle device – just a knurled thread protector at the danger end of the barrel. Unscrew the thread protector to expose the muzzle device threads. Windham Weaponry’s page for this particular model says these threads are ½” x 28 threads per inch – however I did note a company newsletter that stated all 9mm models are produced with ½” x 36 thread pitch. The moral of this story: if you’re looking to install a suppressor on your Windham Weaponry 9mm, be sure to double check the thread pitch.
 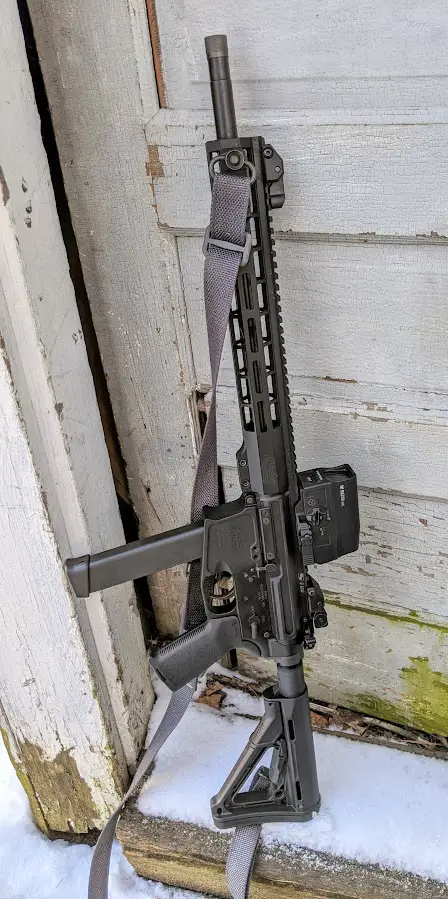 Windham Weaponry kits out the 9mm Carbine with a complement of standard AR accoutrements that are perfectly functional, but I personally feel a touch dated in this ergonomically enhanced and developed firearms worldview. The standard provided collapsible buttstock is a mildly-enhanced throwback to Colt’s Vietnam-induced CAR-15/XM177 design of the 1960s, and the A2 style pistol grip is unchanged since the introduction of the M16A2 variant from the early 1980s. The black nylon sling is really just a strap with zero quick adjustability when installed between the provided QD rail mount and the telescoping buttstock.
 Heads up though: when I yanked the original buttstock off the 9mm carbine to find that the stock receiver is of the Commercial variety, not the Mil-Spec configuration. I checked with Windham Weaponry, and they confirmed that most of their rifles go out the door with Commercial extensions, since the .03” narrower diameter allows the use of both Commercial and Mil-Spec stocks. Just be forewarned – it may be easier to find additional colors and configurations in the Mil-Spec sizes (as the industry as mostly standardized the use of Mil-Spec components), but they will rattle and wiggle just a tiny bit when used on Commercial tubes. Fully functional, just a bit annoying, if that sort of thing bothers you. Just an FYI.
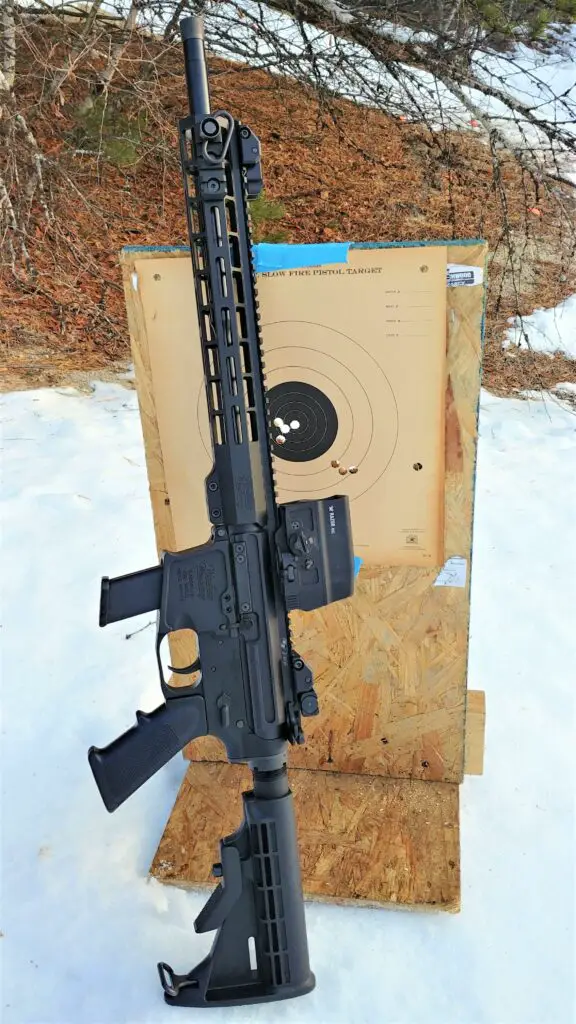 Ahh, here’s the question I’m sure most of you are dying to know the answer to. As soon as this little beast was in my sweaty palms, I grabbed a couple boxes of ammo and headed to the sandpit to get the 9mm Carbine dialed in and ready for some real-world testing. A
  Both rifles performed flawlessly, with either carbine proving to be ridiculously accurate and perfectly capable of providing easy hits under all circumstances and shooting positions. At the 75 yard mark and beyond, I did find that the 9mm definitely didn’t have the outright practical accuracy and flat trajectory that the 5.56 afforded, but hits inside the “kill” box were simple at all ranges to 100 yards with the 9mm. A “running man” drill with 90 9mm rounds at all distances from powder-burn range to 100 yards, and launching bullets from a variety of positions including prone, offhand, weak-side transition, and from behind cover with the rifle laying sideways and the buttstock mounted over the shoulder turned up a perfect score with no rounds striking outside the scoring boxes. I used a mix of Winchester “White Box” 124-grain FMJ rounds and 124-grain FMJ handloads throughout the course with no failures to function. Recoil was positively negligible and the rifle was a breeze to fire quickly and accurately.
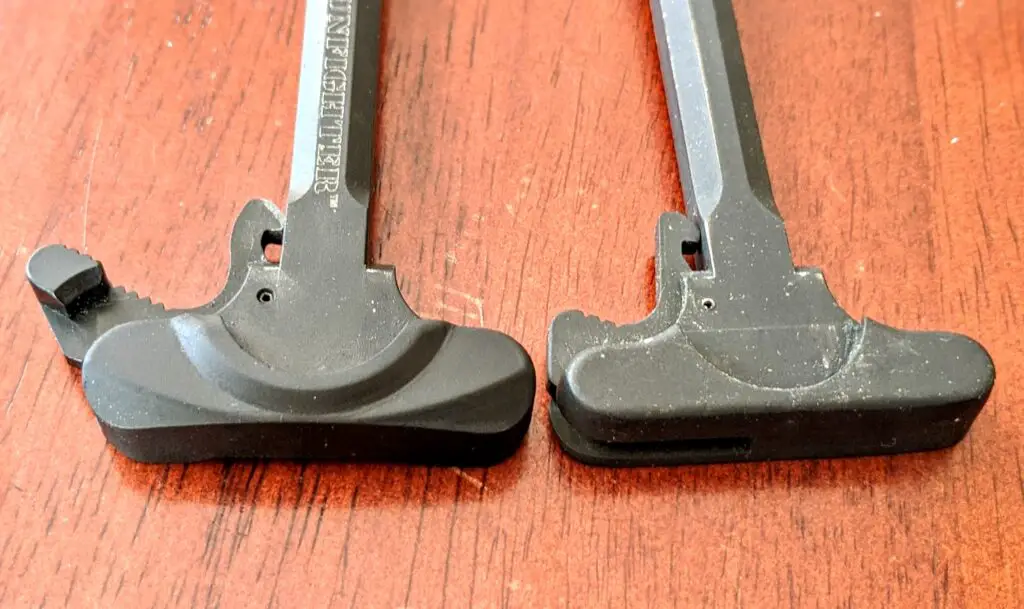
 The pistol caliber carbine efficacy debate is a subject for a future article (one I’m looking forward to indeed); we’re going to assume that your plans dictate that the 9mm caliber is what you want, and you’re looking to take advantage of the Windham Weaponry R16FTT-9MM’s ability to utilize
 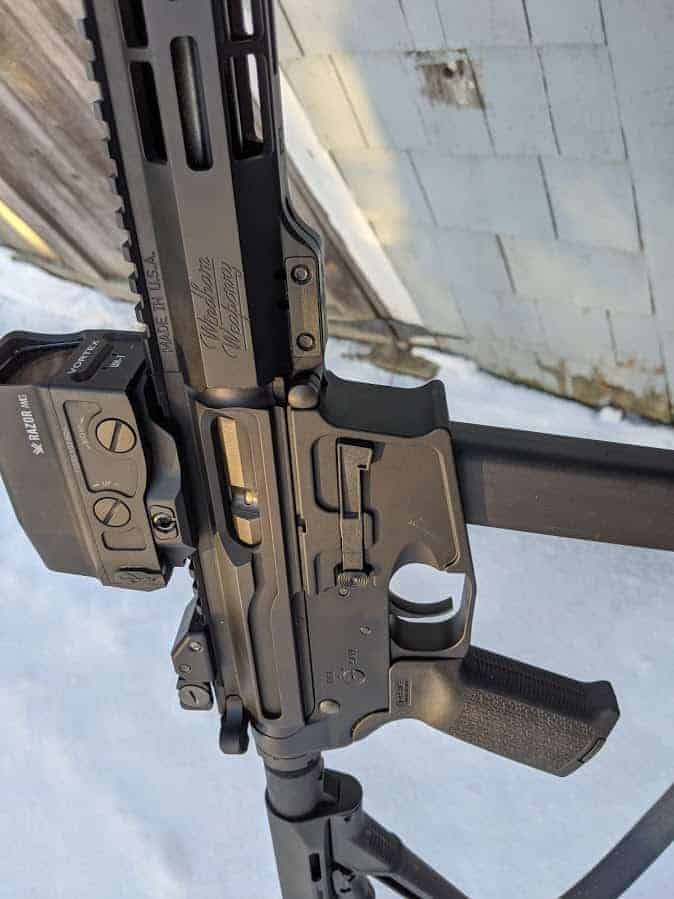 I’ve written before about