No products in the cart.
There Is A Lot Of Speculation That John Bolton Is The “Second Whistleblower”

 I knew that John Bolton was going to be trouble the moment President Trump hired him. Nothing good was ever going to come from having John Bolton as National Security Advisor, and fortunately Trump rejected almost every major recommendation that Bolton made during his entire tenure. If Trump had gone along with Bolton’s agenda, we would probably be at war right now. Being so close to the levers of power and being unable to move his agenda forward time after time was very frustrating for Bolton, and since he was fired by Trump he has been on a “revenge tour”. But would Bolton go so far as to completely betray Trump by becoming the “second whistleblower” regarding the controversial phone call with the president of Ukraine? There is now a lot of speculation among conservatives that this could be the case, and so far Bolton has not publicly denied being the “”second whistleblower”. That doesn’t mean that Bolton is guilty, but if I was President Trump he would be the number one suspect on my list.
Let’s start with the facts as we have them at this hour. It is being reported that a “second whistleblower” has come forward, and that he is being represented by the same legal team that is representing the “first whistleblower”. The following comes from Breitbart…
On Sunday’s broadcast of “This Week,” host George Stephanopoulos opened his show with a report proclaiming a second “whistleblower.”
Stephanopoulos said, “Good morning. Welcome to ‘This Week,’ a week of head-snapping developments. The first key witness testimony to Congress. the first release of text messages from administration officials confirming the pressure campaign or Ukraine outlined in the original whistleblower complaint. That public request from President Trump calling on China to investigate Joe Biden. A new request for documents from Vice President Pence. This morning more breaking news. ABC News has learned that the legal team representing the first whistle-blower is now representing a second whistleblower. Attorney Mark Zaid said he is a member of the intelligence community with firsthand information on some of the allegations at issue.”
The original whistleblower hired “a former Schumer and Hillary Clinton staffer” named Andrew Bakaj to represent him, and we also know that Bakaj has given money to Joe Biden’s presidential campaign.
Following the revelation of this “second whistleblower”, Bakaj confirmed on Twitter that his firm is now representing “multiple whistleblowers”.
IC WHISTLEBLOWER UPDATE: I can confirm that my firm and my team represent multiple whistleblowers in connection to the underlying August 12, 2019, disclosure to the Intelligence Community Inspector General. No further comment at this time. https://t.co/05b5aAVm2G
— Andrew P. Bakaj (@AndrewBakaj) October 6, 2019
So let’s summarize what we know so far.
-We know that the second whistleblower is a “he” according to attorney Mark Zaid.
-We know that the second whistleblower has at least some “firsthand knowledge” about the call with the president of Ukraine.
-We know that the second whistleblower has been a member of the intelligence community.
-We know that the second whistleblower is clearly not loyal to Trump.
John Bolton certainly fits that profile.
Can any of you think of another potential suspect?
Of course in Washington there are always more suspects, but it is interesting to note that Trump has apparently been very suspicious of Bolton for quite some time now…
One veteran political consultant in Washington tells Cockburn that Trump is afraid Bolton is the mastermind behind all the damaging leaks on his secret dealings with the Ukrainians; the whistleblower’s Deep Throat, if you will. This, he believes, is why Trump’s cheerleader in the Senate, Lindsay Graham, keeps asking who was feeding the CIA whistleblower who came forward with details of a call between Trump and the Ukrainian president (in which Trump asked for dirt on the Democratic frontrunner, Joe Biden). Graham tweeted: ‘It is imperative we find out which White House official talked to the whistleblower and why. Why didn’t they lodge the complaint?’
And thanks to The Hill, we also know that John Bolton “opposed the phone call between President Trump and Ukrainian President Volodymyr Zelensky” while he was still a member of the administration…
Former White House national security adviser John Bolton opposed the phone call between President Trump and Ukrainian President Volodymyr Zelensky at the center of an impeachment inquiry launched by House Democrats, NBC News reported Monday.
Three current and former administration officials told the network that Bolton was opposed to the call because he was concerned Trump wasn’t coordinating with advisers on what to say and might air personal grievances.
John Bolton could put all of this speculation to rest by simply denying that he is the second whistleblower, but he has not done that at this point.
Perhaps Bolton thought that he could make a name for himself by being the man that got Donald Trump out of the White House, and it does seem quite likely that Trump will be impeached by the House of Representatives, but Mitch McConnell is being quite clear about the fact that Trump will be protected by the Senate as long as he is the majority leader…
The Senate majority leader released last week a brief video ad on Facebook, which prompts viewers to financially support his reelection campaign, and insisted that the pathway forward for impeachment proceedings to cease is with him maintaining leadership in a Republican-controlled chamber.
‘Nancy Pelosi is in the clutches of a left-wing mob,’ McConnell said in the ad. ‘They’ve finally convinced her to impeach the President. All of you know your Constitution. The way that impeachment stops is a Senate majority, with me as majority leader.’
As long as McConnell refuses to move from that stance, it will be almost impossible for pro-impeachment forces to get enough votes to convict Trump in the Senate, and that means that Trump will almost certainly remain in the Oval Office.
But the endless coverage of this impeachment process by the mainstream media will stir up hatred on the left like never before, and it is setting the stage for utter chaos when the Republicans in the U.S. Senate vote to protect Trump.
It doesn’t take a genius to see how all of this is going to play out. But the mainstream media will continue to breathlessly cover this process 24 hours a day, and they will put relentless pressure on Republican senators in an all-out effort to get some of them to crack.
No matter how this drama plays out, this is going to be a very ugly chapter in our history, and our political system will never be the same again once it is over.
 About the author: Michael Snyder is a nationally-syndicated writer, media personality and political activist. He is the author of four books including Get Prepared Now, The Beginning Of The End and Living A Life That Really Matters. His articles are originally published on The Economic Collapse Blog, End Of The American Dream and The Most Important News. From there, his articles are republished on dozens of other prominent websites. If you would like to republish his articles, please feel free to do so. The more people that see this information the better, and we need to wake more people up while there is still time. Of course the most important thing that we can share with people is the gospel of Jesus Christ, and if you would like to learn more about how you can become a Christian I would encourage you to read this article.
The post There Is A Lot Of Speculation That John Bolton Is The “Second Whistleblower” appeared first on The Economic Collapse.

 The
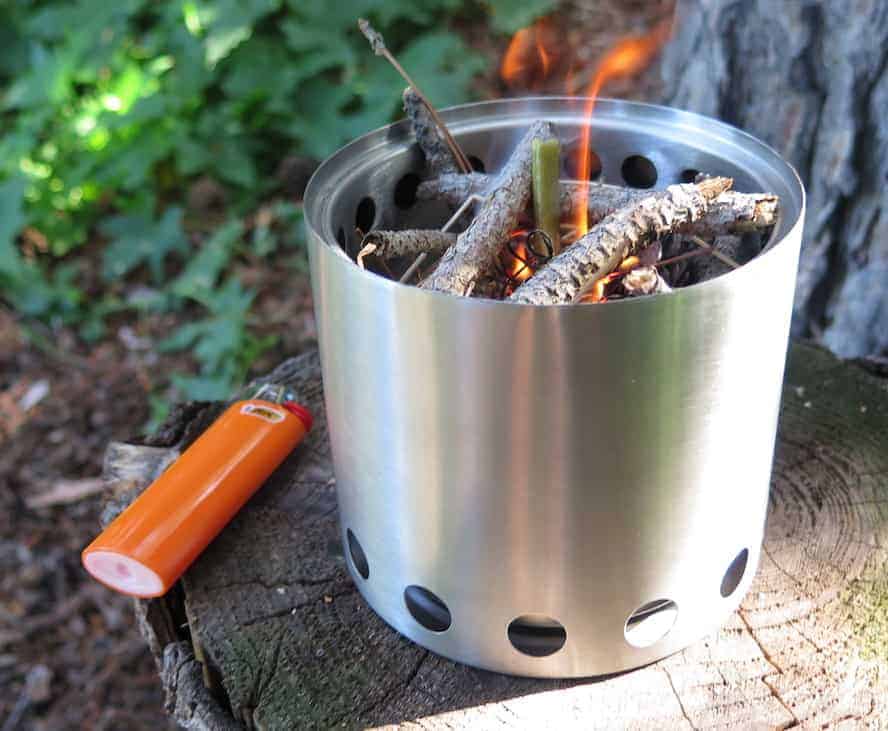
The  Air begins its journey under the main fire due to a wire grate that delineates the base of the burn chamber from a sub-chamber that doubles as an ash trap. As the combustion gasses ascent to the upper levels of the stove, they are heated before pouring into the chamber through the holes lining the upper reaches of the inside of the inner wall. The hot air offer an abundance of oxygen causing a gassification effect that takes the tradition campfire wood heating to amazing levels.
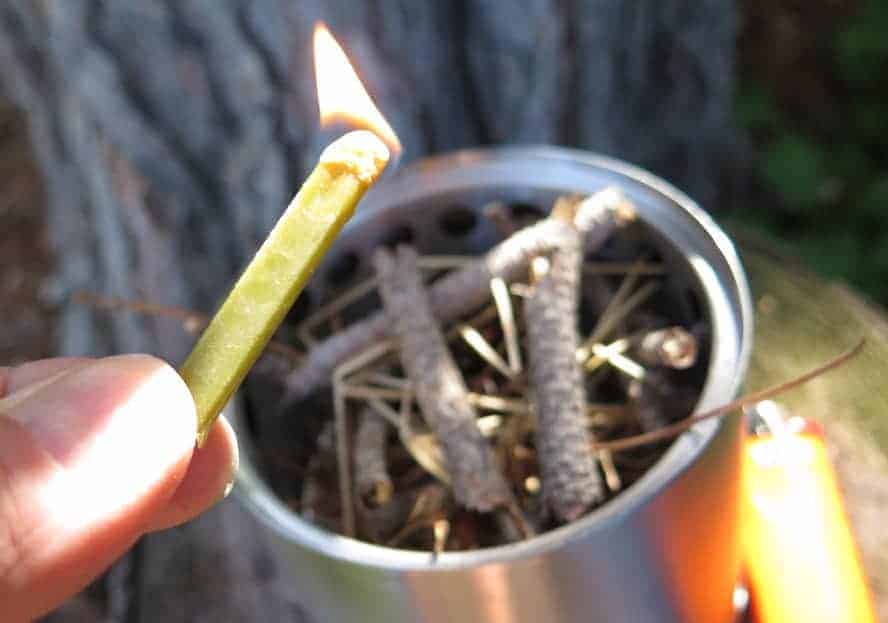 An additional benefit from the dual airflow system is that there is extremely little smoke from the stove when burning efficiently. Like none. Of course there is plenty of smoke on both ends of the time you use the stove, but a large part in the middle burn time when cooking and campfireing are done has no noticeable smoke. There is still plenty of woodfire smell, however. One time from a bit of a distance, I thought my stove was pouring out the smoke only to realize as I neared that it was spraying steam like a train whistle out of a snug fit pot lid. And no smoke.
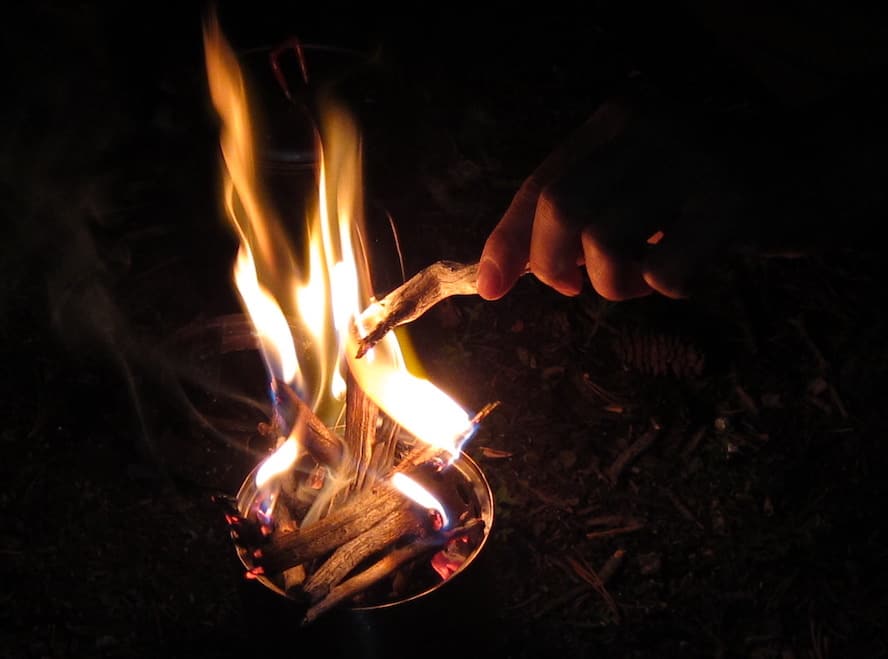 When burning wood, you don’t have to be diligent about the stove’s operation. You can add some wood and walk away. If it burns down, you add more. If your water boils, then good and it will just boil longer. But the Solo Stove completely removes the worry about conserving fuel. And once you get into the Solo Stove mindset, you see fuel everywhere and in abundance.
 There are two pieces to the Solo Stove, a main dual container consisting of the two layers of steel, the ash basin, and plenty of holes above and below main chamber. The other piece is a ring of steel with a lip that can either dip into the main can for storage or fly above it as a pot support and doorway for adding more fuel to the combustion chamber.
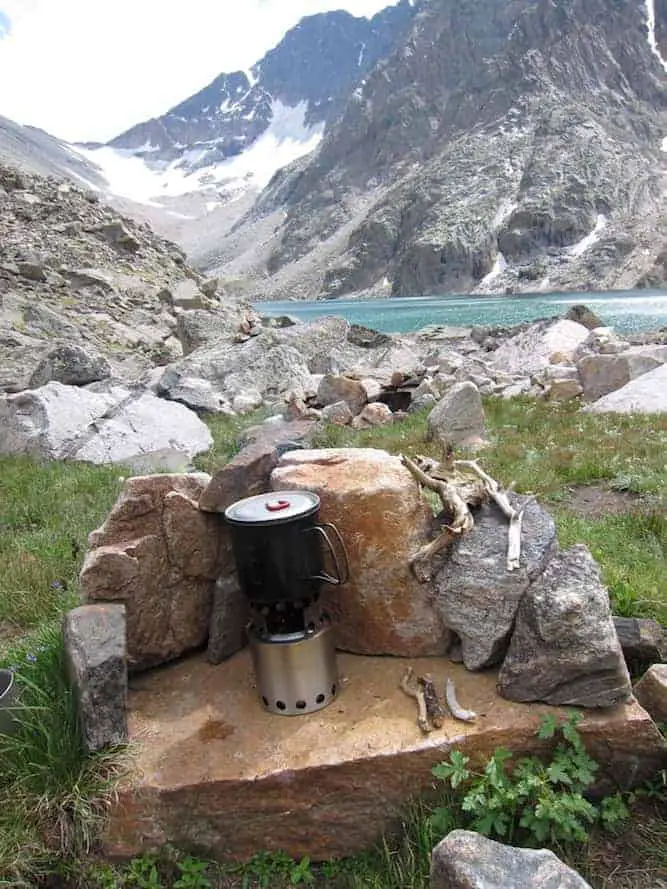 I’m not sure if it’s right or not, but I’ve extinguished my
 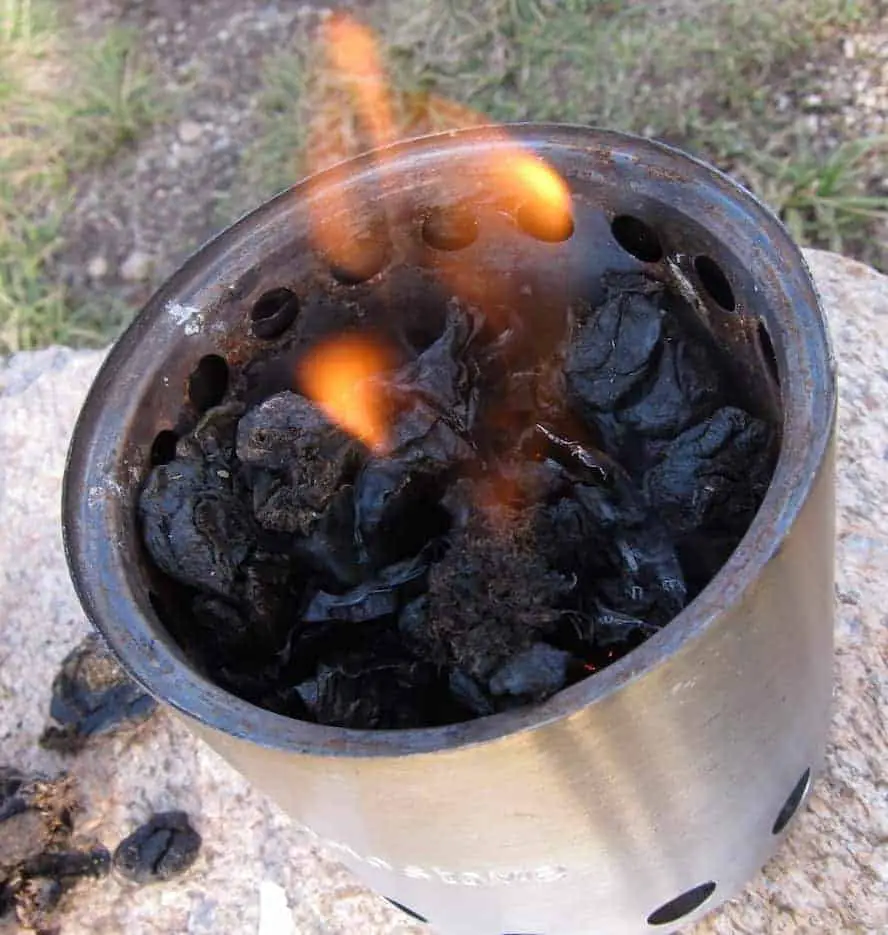 In use, I had a boiling quart of water in 10 minutes plus or minus. Usually plus. I used a commercial fire tinder to fire up the stove quickly, but you can use traditional tinder and firesticks to launch this rocket. Some of the benefits include no real concerns for fuel. The only time I ran into a fuel shortage was when I was over 11,000 feet in the
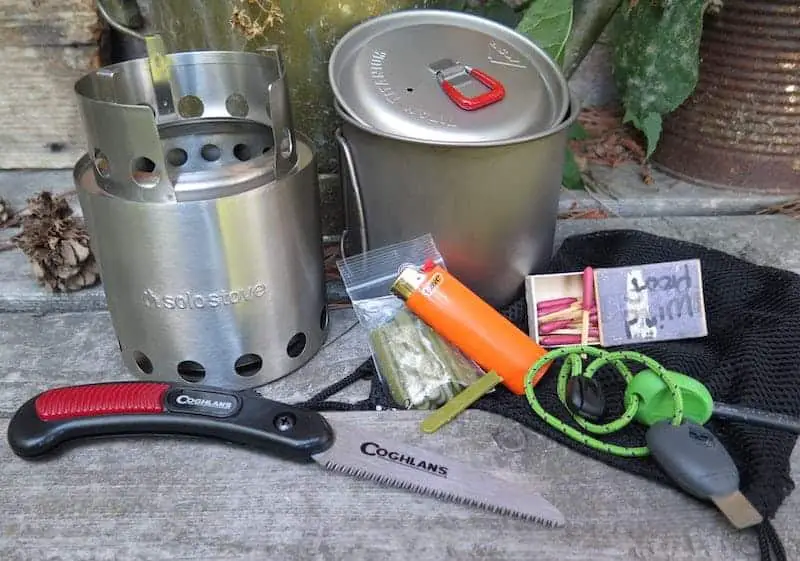
 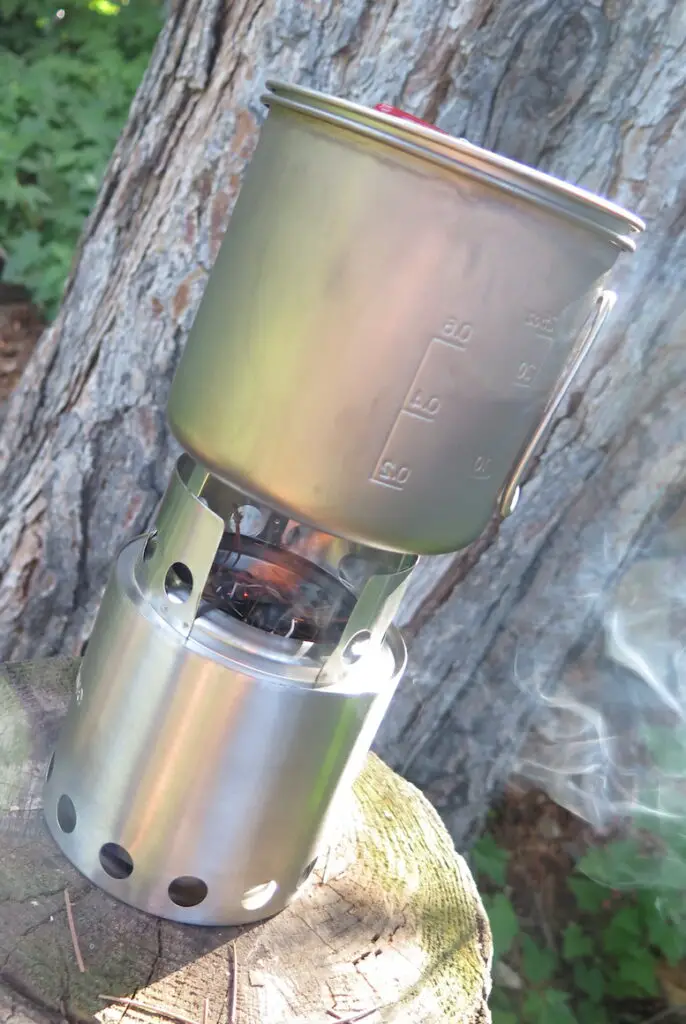 I have a 900 milliliter titanium pot and small fire making kit I carry with my Solo Stove Lite.


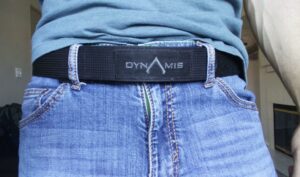 I’ve been on the search for the perfect belt for a long time. I have a
 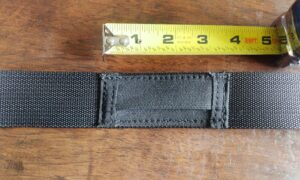 The two things that attracted me to this belt were the low-profile design, and the ability to hide things in the pockets, of which there are three. The first sits at the small of your back and is perfect for a spare key. This is my favorite pocket because it is top loading and easy to get into. The others are side loading and are very hard to get things in and out of. The key pocket is about 1-1/8” from top stitch to bottom stitch and is 3” long.
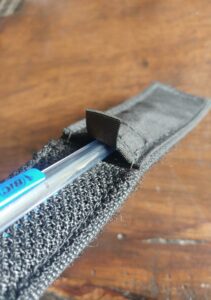 There are two other pockets at the front of the belt, where the buckle would be. They are right up against each other, end to end. They are the same size as the key pocket but configured differently. One is made of solid fabric with a Velcro closure on the side. The
  Here I keep a razor blade, About 30” of
 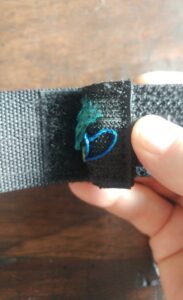 My complaints are few. The pockets can be difficult to get into, and harder to get things out of. If you put a handcuff key into one of the side loading pockets, you will never get it out. Unless you take the belt off, use needle nose pliers, and get lucky, its staying in there. For items like this, you have to devise some kind of pull tab system. I suspect the pockets would be slightly easier to get into with the 1.75” belt, but then I’ve had problems with belt loops and holsters at that size. Lastly, the belt material, Velcro, and pockets have made the belt bulky at the front. Loaded with a few items, the belt is still ½” to ¾” thick. For a lot of people this won’t be a problem, but for slimmer people in fitted shirts, you will have an odd looking “shelf” protruding from behind your shirt. If you have a belly, your shirts are not fitted, or you wear a flannel or other thicker material shirt, this is a non-issue. I think this could have been improved by distributing the pockets somewhere other than the front and sticking to the key pocket design instead of the side loading pocket. That’s my just two cents.
 Pros:
Pros: