No products in the cart.
An Indicator With A 100% Perfect Track Record Of Predicting Recessions Says That Another One Is Coming

 You can believe that we will somehow beat the odds this time if you want, but history is completely against you. One of the biggest reasons why there is so much anxiety on Wall Street right now is because of how the yield curve is behaving. We have seen yield curve inversions before each of the last seven U.S. recessions, and now it has happened again. Perhaps this helps to explain why insiders are dumping stocks right now as if there will be no tomorrow. If you were looking for a giant waving red flag to tell you that it is time to run for the exits, it doesn’t get much better than this. This week, we watched the yield curve do something that it hasn’t done in 12 years…
The spread between the 10-year Treasury yield and the 2-year rate fell to negative 5 basis points, its lowest level since 2007. This is called a yield curve inversion. Experts fear it because in the past it has preceded recessionary periods. The 3-month Treasury bill rate also traded higher than the 30-year bond yield.
“The primary thing is yields are going down and going down with some acceleration,” said Art Cashin, the director of floor operations at UBS.
In addition, the spread between 3 month Treasury bonds and 10 year Treasury bonds just hit negative 50 basis points. We haven’t seen that happen since March 2007.
And as David Rosenberg has noted, when the spread between 3 month Treasury bonds and 10 year Treasury bonds goes negative for at least three months, we have a recession 100% of the time…
We now have had three months of a 3-mo/10-yr yield curve inversion. The track record this has had in predicting recessions: 100%.
Yes, it is theoretically possible that this indicator could be proven wrong this time.
But do you really want to bet against an indicator with a track record of 100% accuracy?
Plus, we have a trade war with China to deal with this time around. Hopeful comments from President Trump briefly bolstered the markets on Monday, but over in China prominent voices continue to pour cold water on the notion that a deal will happen any time soon. Here is an example from Tuesday…
Sentiment was also dampened after Hu Xijin, editor-in-chief of the Global Times in China, tweeted that China is “putting so much emphasis on trade talks,” adding that “it’s more and more difficult for the US to press China to make concessions” as China’s economy becomes increasingly driven by its domestic growth. China announced measures aimed at boosting consumption, including potentially removing car-buying restrictions.
Unless one side chooses to fold like a 20 dollar suit, there isn’t going to be a resolution to this trade war any time in the near future, and that is going to mean a tremendous amount of pain for the U.S., China and the entire global economy.
Another indication that things are about to get bad is the fact that investors are starting to flock to precious metals.
Gold and silver are considered to be “safe haven assets” during a financial crisis, and right now gold and silver are both surging…
Gold prices are moderately higher in early U.S. trading, while the silver market is again sharply higher and hit another two-year high overnight. Bullish technical postures in both metals continue to invite the chart-based buyers to climb on board the long side. A weaker U.S. dollar index is also supportive to the precious metals markets today. December gold futures were last up $4.60 an ounce at 1,541.90. December Comex silver prices were last up $0.295 at $18.075 an ounce.
But for most hard working Americans, it is going to be far more important to build up an emergency fund as we head deeper into this new crisis, and this is something that I have written about repeatedly. The reason why so many Americans lost their homes during the last recession was because they were living right on the edge financially. It is imperative that you have a financial cushion so that you can pay your basic expenses when things start getting really hard.
Unfortunately, it is often young people that get the hardest during an economic downturn, and this is something that Annie Lowrey discussed in her most recent article…
Recessions are never good for anyone. A sputtering economy means miserable financial, emotional, and physical-health consequences for everyone from infants to retirees. But the next one—if it happens, when it starts happening — stands to hit this much-maligned generation particularly hard. For adults between the ages of 22 and 38, after all, the last recession never really ended.
Millennials got bodied in the downturn, have struggled in the recovery, and are now left more vulnerable than other, older age cohorts. As they pitch toward middle age, they are failing to make it to the middle class, and are likely to be the first generation in modern economic history to end up worse off than their parents. The next downturn might make sure of it, stalling their careers and sucking away their wages right as the millennials enter their prime earning years.
I understand that a lot of people may not want to hear this, but every economic indicator is telling us that a U.S. recession is coming, and many experts believe that it will be far worse than the last one.
If you prepare in advance for what is coming, that is going to help to take fear out of the equation. Because when things get really crazy, it is those that don’t understand what is happening that are going to give in to fear, depression and despair.
We have not seen an economic environment like this in a decade, and there is no reason to believe that a miracle is going to come along and rescue us from the storm that is now looming above us.
The months ahead promise to be quite “interesting”, and not in a good way.
 About the author: Michael Snyder is a nationally-syndicated writer, media personality and political activist. He is the author of four books including Get Prepared Now, The Beginning Of The End and Living A Life That Really Matters. His articles are originally published on The Economic Collapse Blog, End Of The American Dream and The Most Important News. From there, his articles are republished on dozens of other prominent websites. If you would like to republish his articles, please feel free to do so. The more people that see this information the better, and we need to wake more people up while there is still time.
The post An Indicator With A 100% Perfect Track Record Of Predicting Recessions Says That Another One Is Coming appeared first on The Economic Collapse.


 or woman. When you start adding in children, spouses, and pets,
 good one is “drop it!” I can’t tell you how many times I’ve been walking my dog, and suddenly she is chewing furiously on something she’s found and swallowed it before I can ID it. Is your dog healthy enough to walk several miles? Walking or running with your dog every day is a good way to keep you both in shape. A trip to the vet to ensure your pup is up to date on immunizations is important. In some states, if your dog bites someone and does not have a recent rabies vaccine, they may be put down. If they tangle with a wild animal, it’ll be one less thing you will have to worry about. Make sure they have a collar with your information on the tag. Keep in mind tags and collars can slip off. You should consider
  of her pack. In a perfect world, we would stow her food in dry sacks, but haven’t made the change yet. Wet food is heavy, I would steer clear of it for this application.
 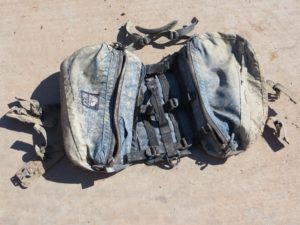 Granite Gear are our favorite. Mountainsmith, Ezy Dog, and
  have a medical kit, and a lot of the same things will work on your pup (ie: bandages). That being said, you should
  will be pulling double duty with your dog’s doodie.

 If only the speed and dexterity of camera tripods could extend to rifle stability. Ahh, but there is a saddle-like apparatus that snipers have been using for years. But the three drawbacks of the saddles include price (good ones exceed $300), weight (good ones hover round one pound), and the saddles completely consume the
 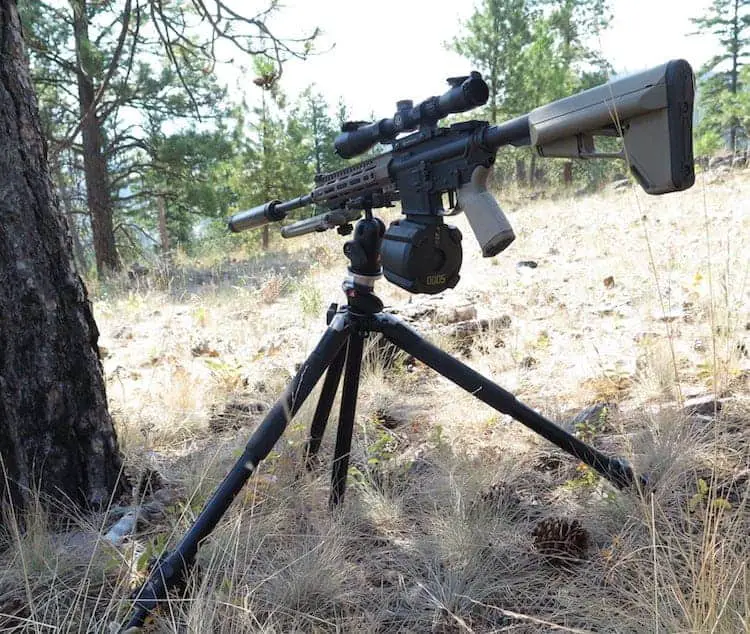 Stable shooting platforms are not rare. From sticks and sandbags, to fence posts and pickup truck hoods, standard rifles smoothly slide around providing the shooter an optimum position. Then came the popular bench rests like the
  Bolting onto the underbelly of your handguard, the
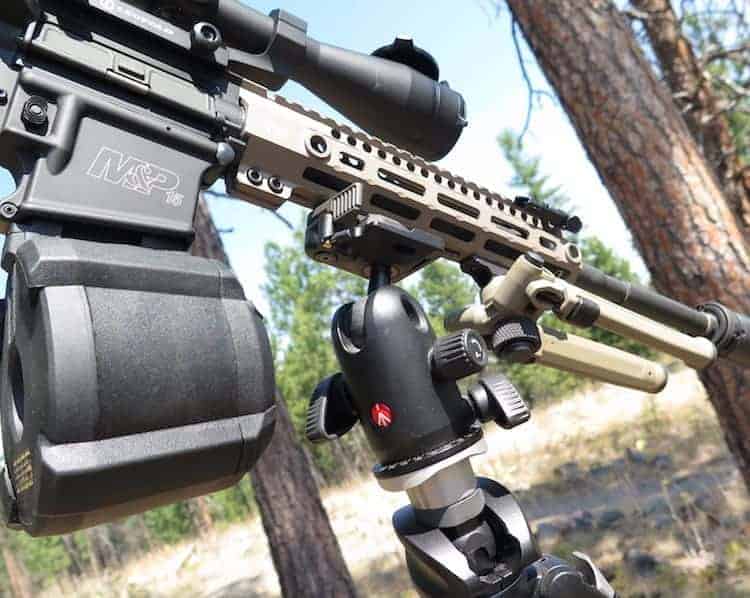
 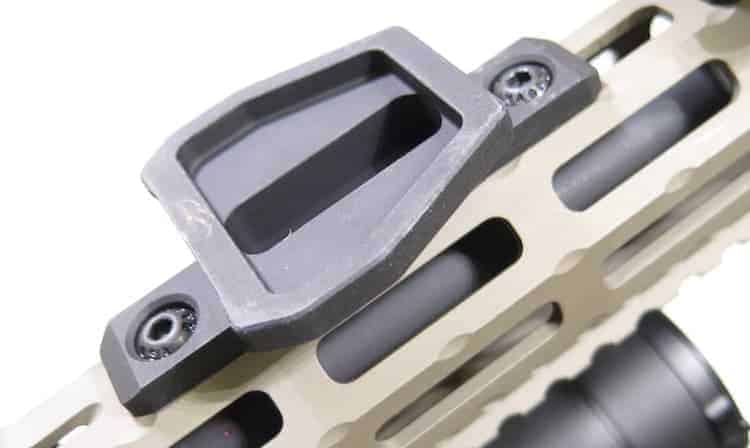 equally quality tripod head.
 One of the amazing aspects of using a Magpul M-LOK Tripod Adaptor and tripod support is the extreme diversity of shooting positions, heights, and angles. Basically, any direction a camera on a tripod can point at, an AR15 can as well.
 For those with more extensive needs, Magpul makes solutions for a popular railed tripod mount that not only mates with more advanced tripod heads, but slides back and forth for additional balance preferences. Magpul’s Dovetail Adapter chassis rail for RSS and ARCA tripod head interfaces is the next step for those with greater stability needs. If the future for rifle tripod adapters looks bright, Magpul just makes it blindingly bright.